The Drupal "WYSIWYG" Editor
[Level – Beginner]
This is where you will edit the content of the page, this section is broken down into different parts to show you what each part controls on the page.
Title and Menu Area
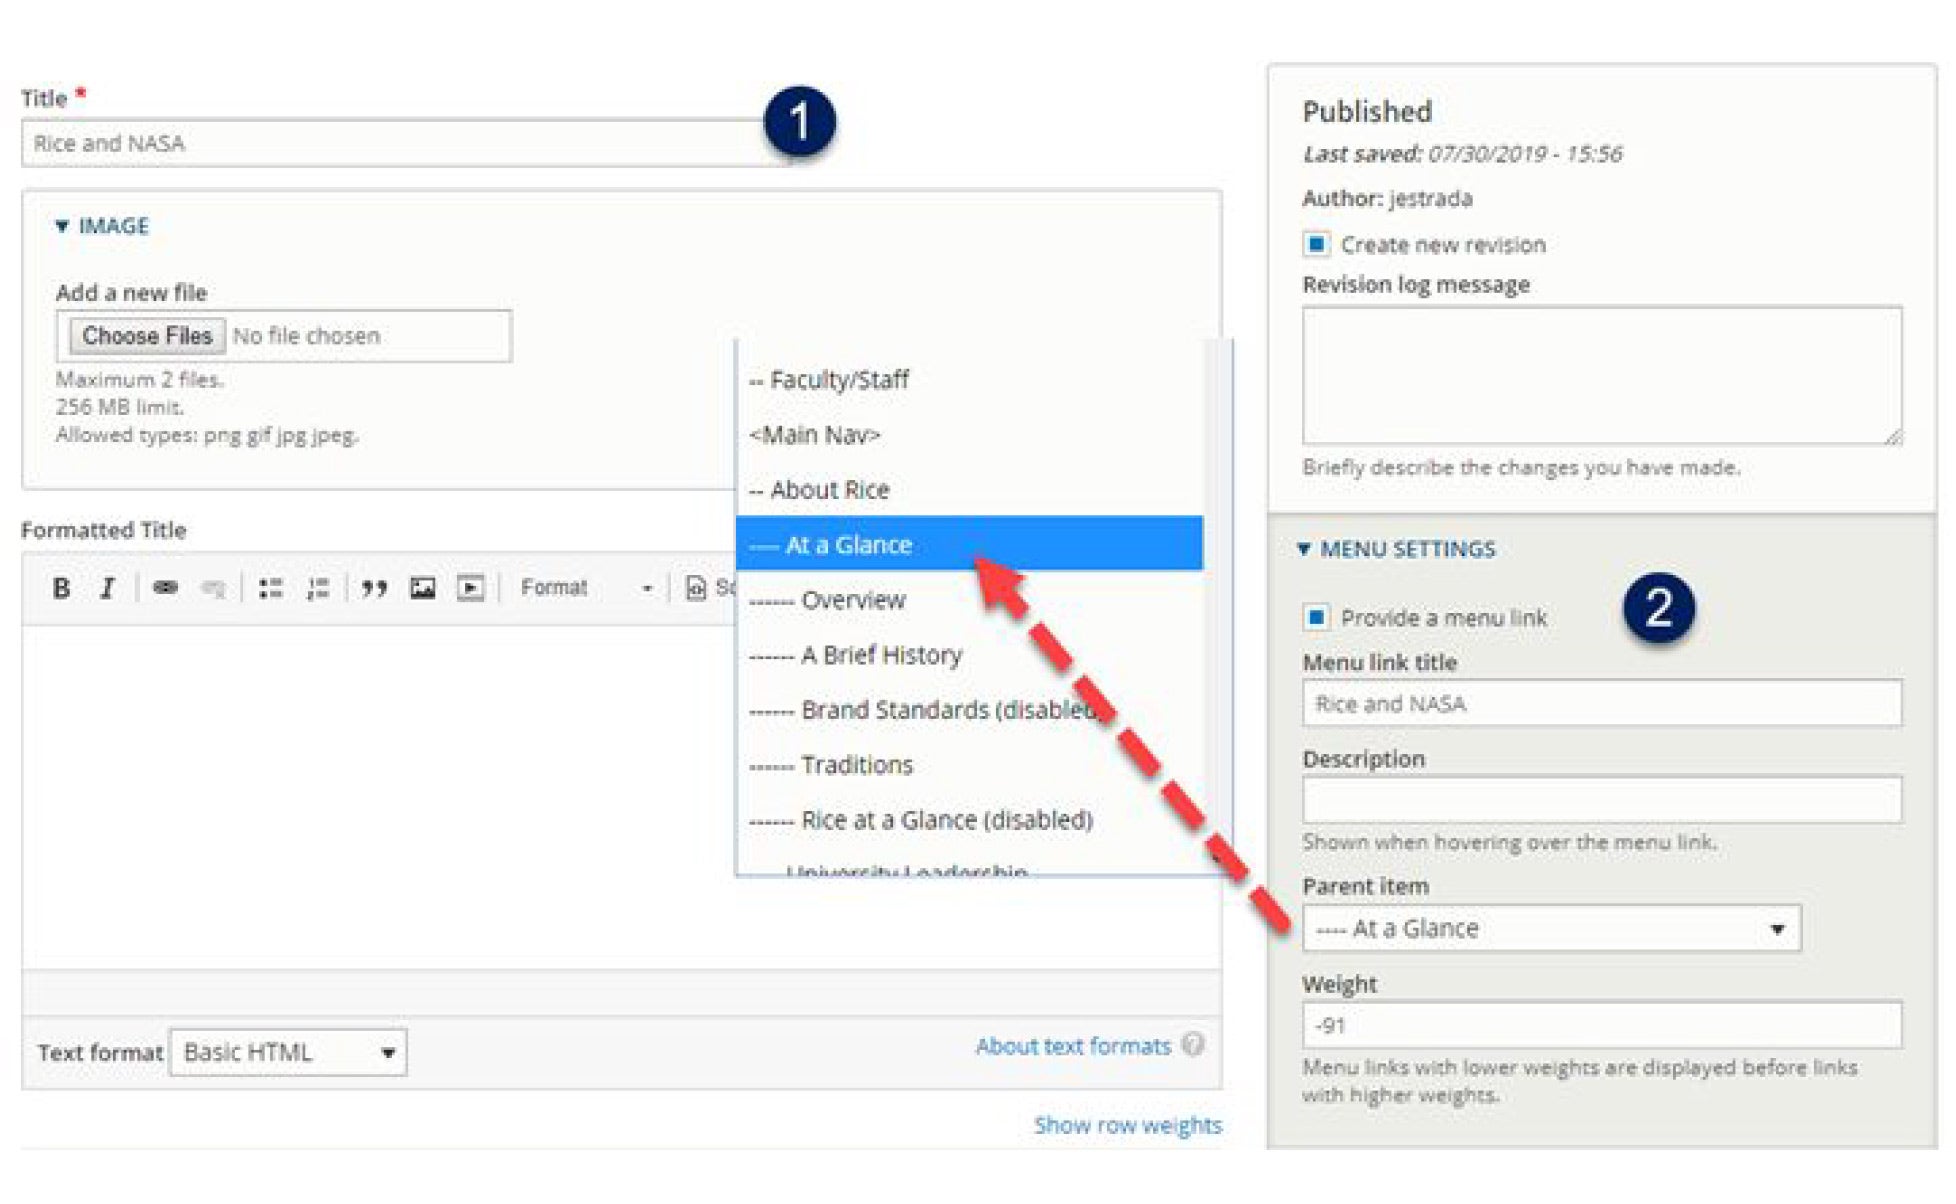
1. Title: Place the title of the page here (this is what will show up in the search engines and in the tab on your browser)
2. Menu Settings: This is what will display in the website main menu and at what level.
- 2.1. If “Provide a menu link” is selected, you will have the following options:
- 2.1.1. Menu link title – This will either replicate the title of the page or you can create a custom title for the menu.
- 2.1.2. Description – only necessary if your title doesn’t make sense.
- 2.1.3. Parent Item – This is where you can position the page with in the menu
Hero Area
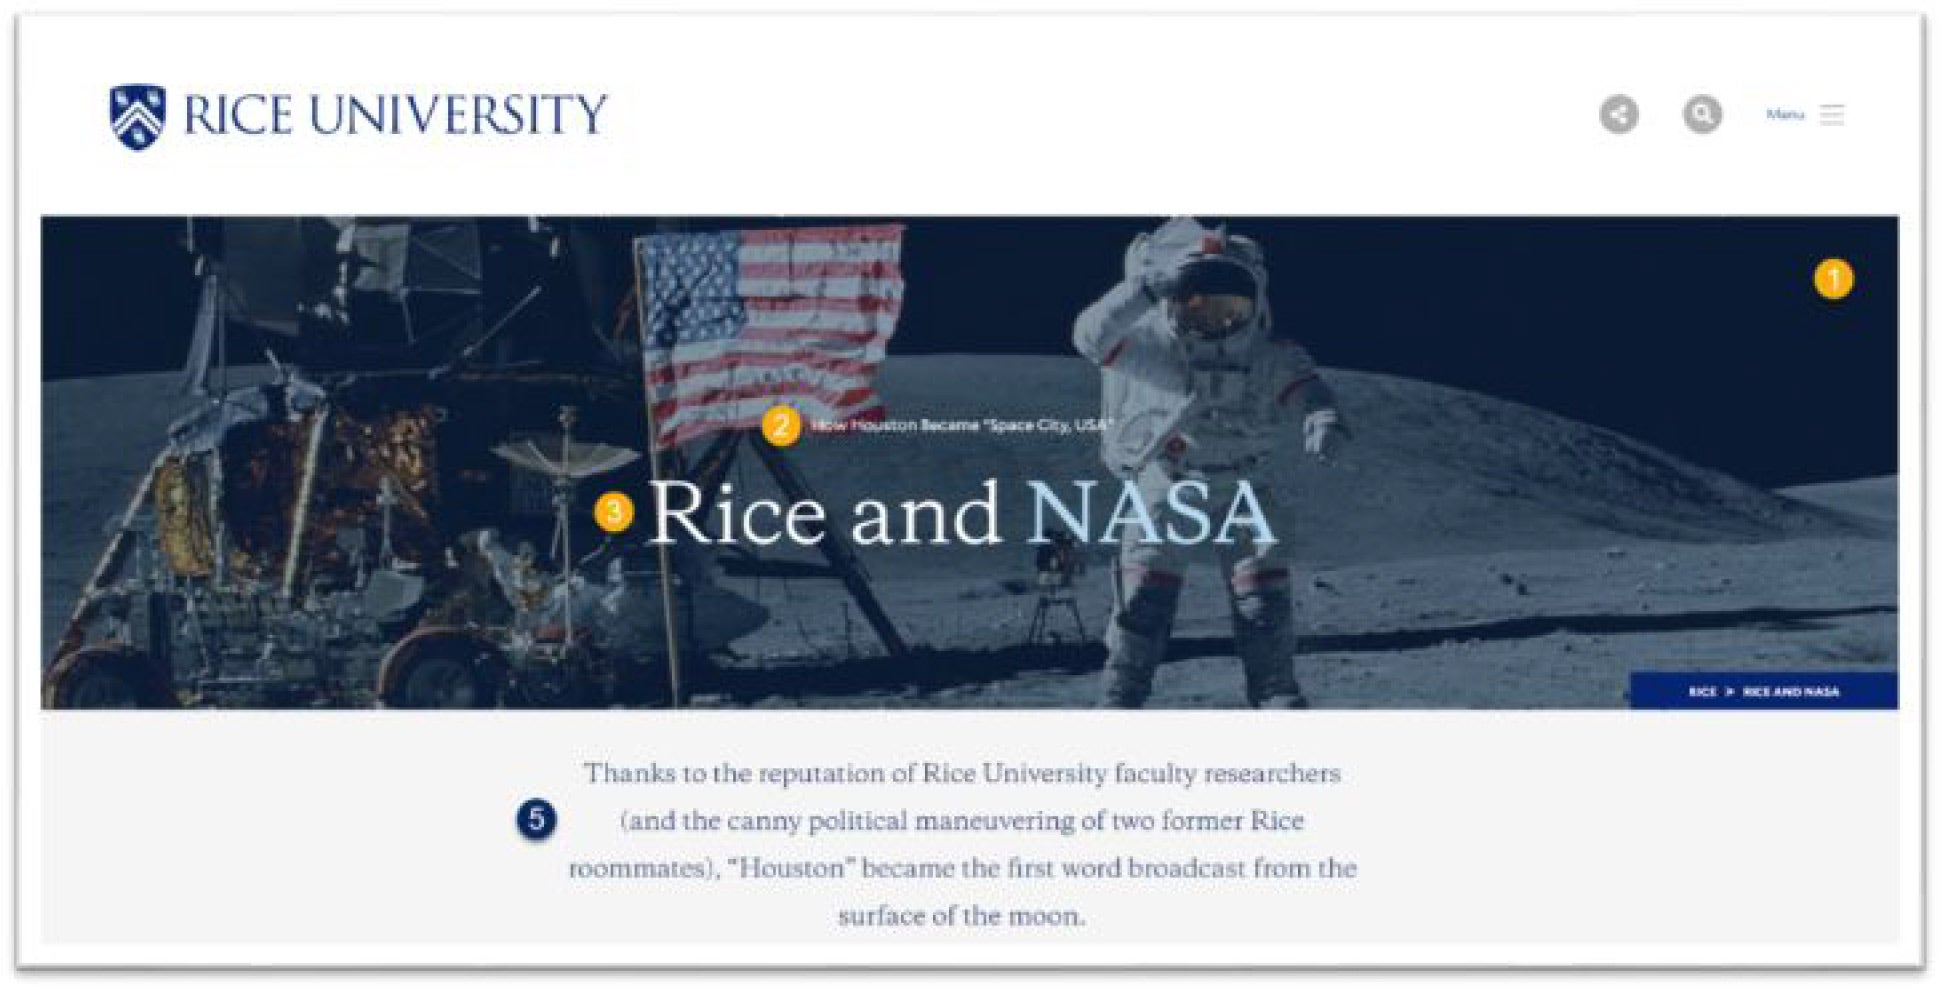
3. Hero Image, Intro, Title and Body + Page Summary and Alias: The following area has multiple pieces to build out a dynamic hero image as well as set up summary for the search engines and alias to shorten the URL.
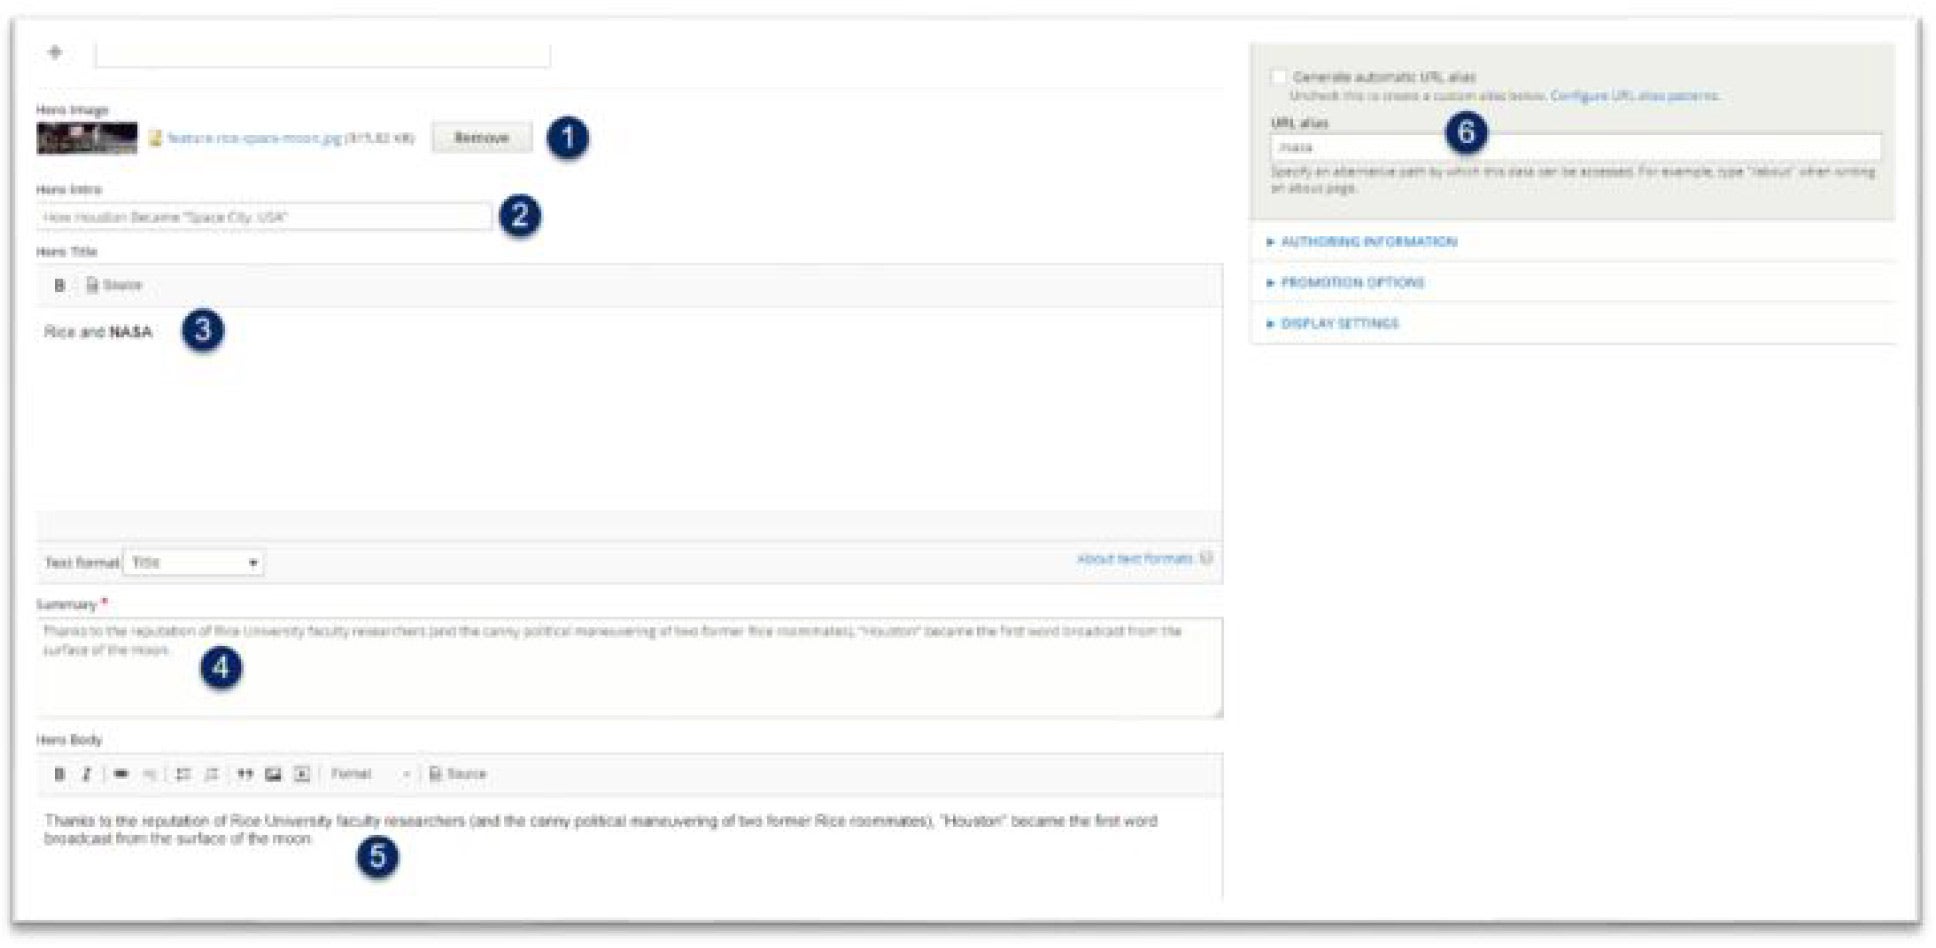
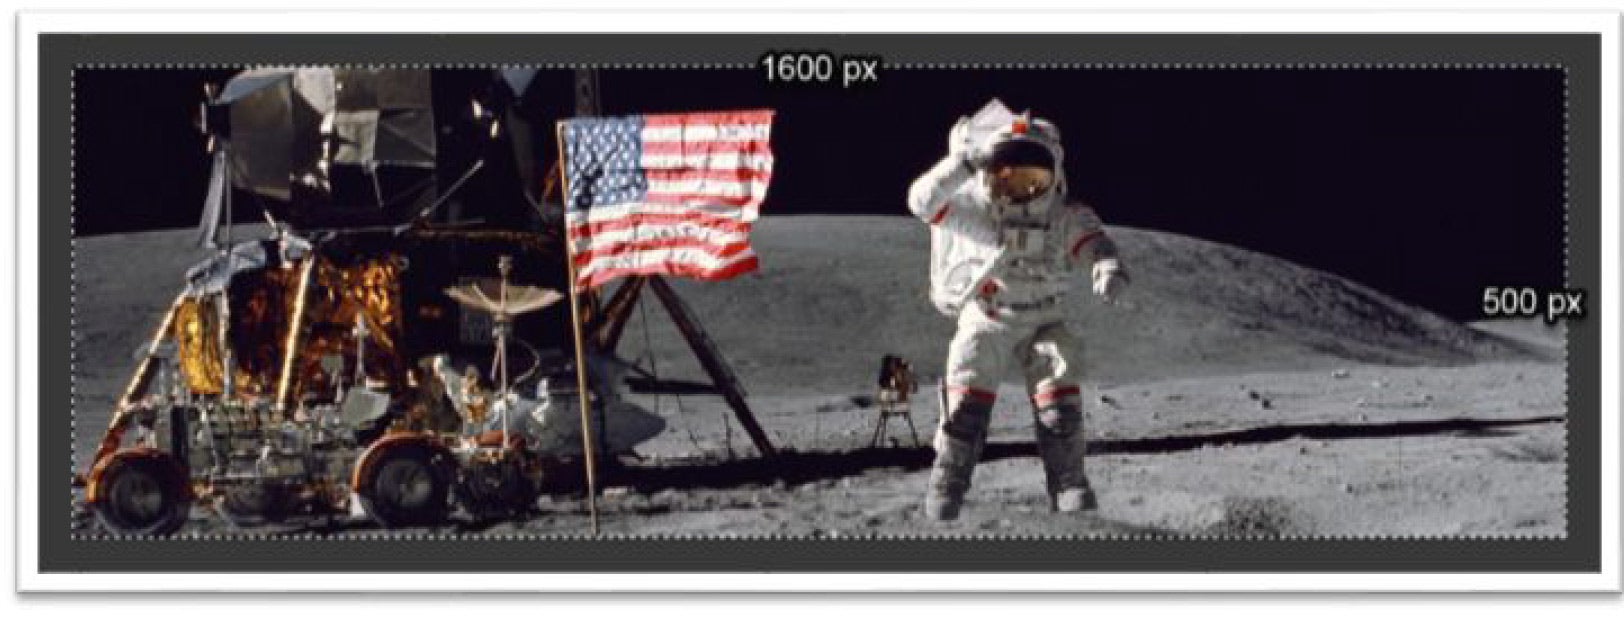
- 3.1. Hero Image: This is where you will add the image that displays in the top of the content. The dimensions for this image are (1600px wide by 500pxhigh) – please compress the images in a program like Photoshop to be under 400k.
- 3.2. Hero Intro: This is the intro text that goes above the Hero Title (optional)
- 3.3. Hero Title: This is the large text that is displayed over the Hero Image (Tip: You can add color to the text by bolding the word(s) – see example below)
- 3.4. Summary: This text is what the search engine uses to display under the title of the page in its results;it is also used in the preview for social media platforms such as Facebook and Twitter)
- 3.5. Hero Body: This text is what shows up under the Hero Image and is separated from the main copy with a gray background. This can be used to emphasize what is in the Hero Image or a lead in to the Body copy that follows.
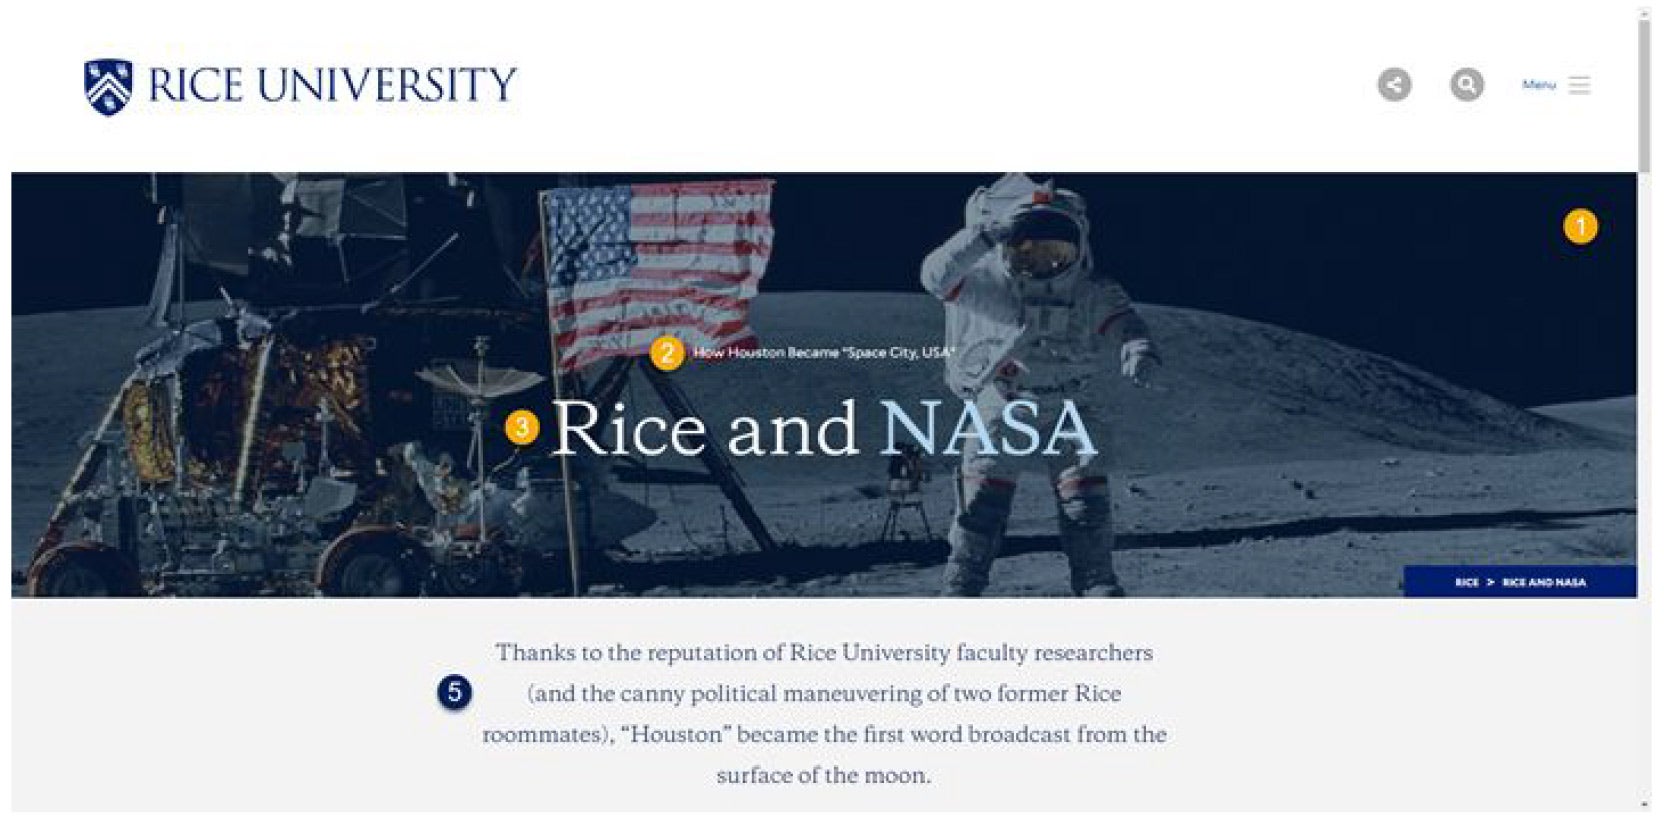
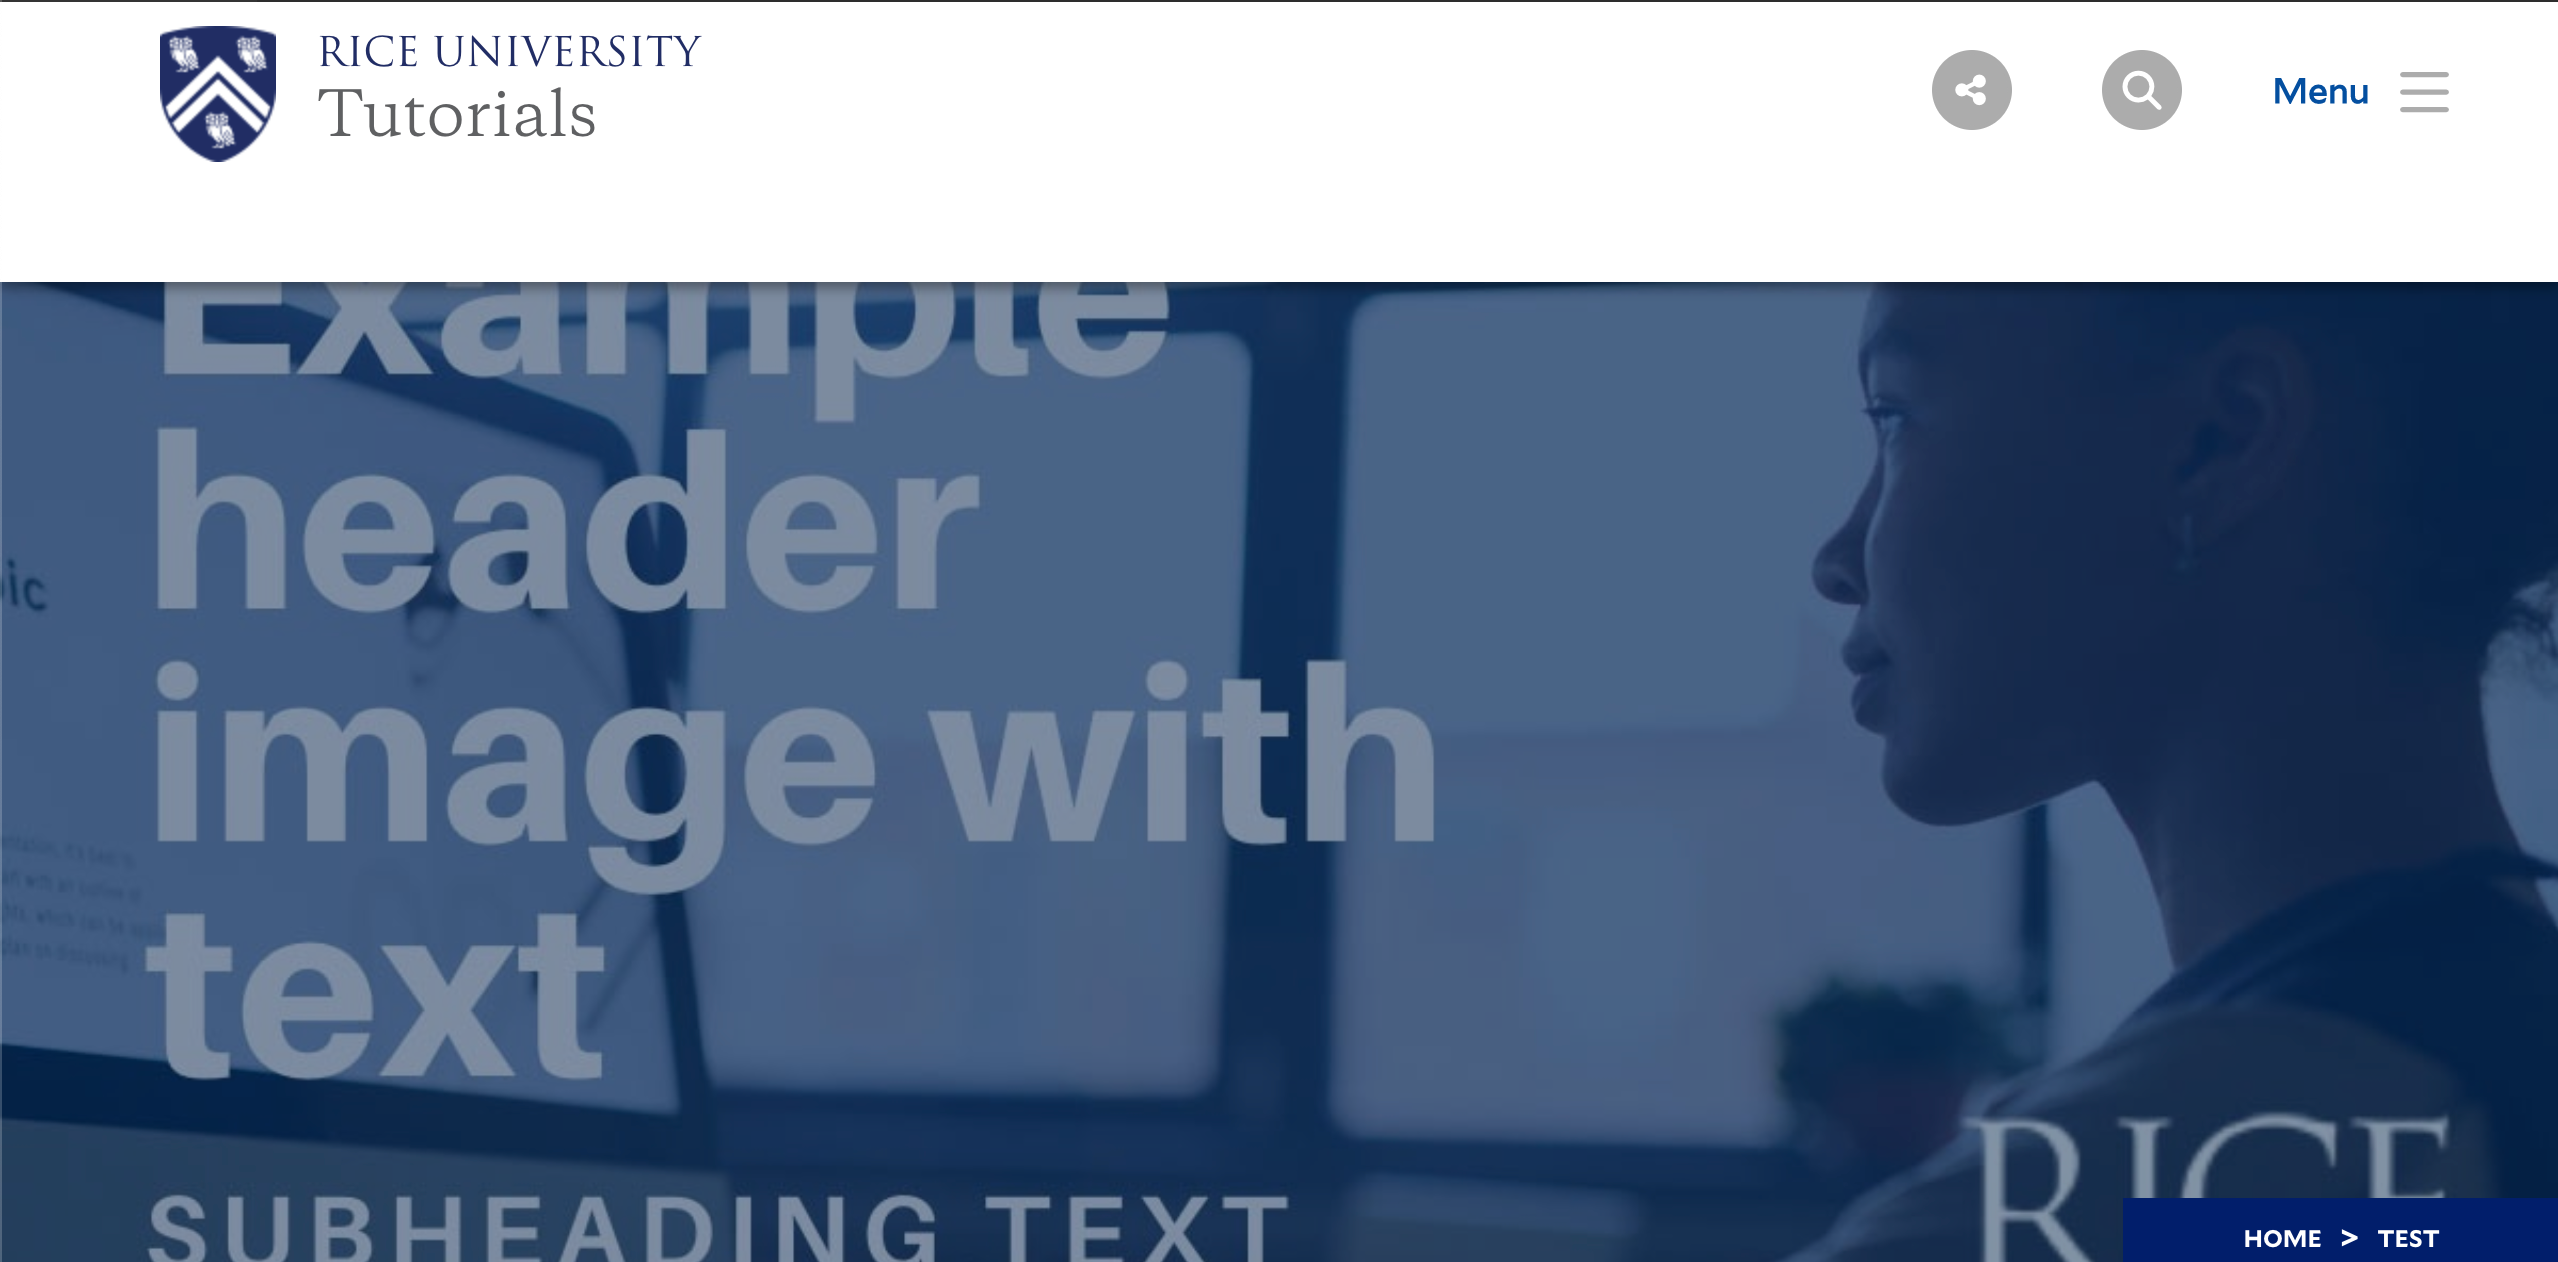
Text In Hero Image
Images that contain text as backgrounds in blocks cannot reflow for mobile, and using responsive design, the image becomes illegible across devices.
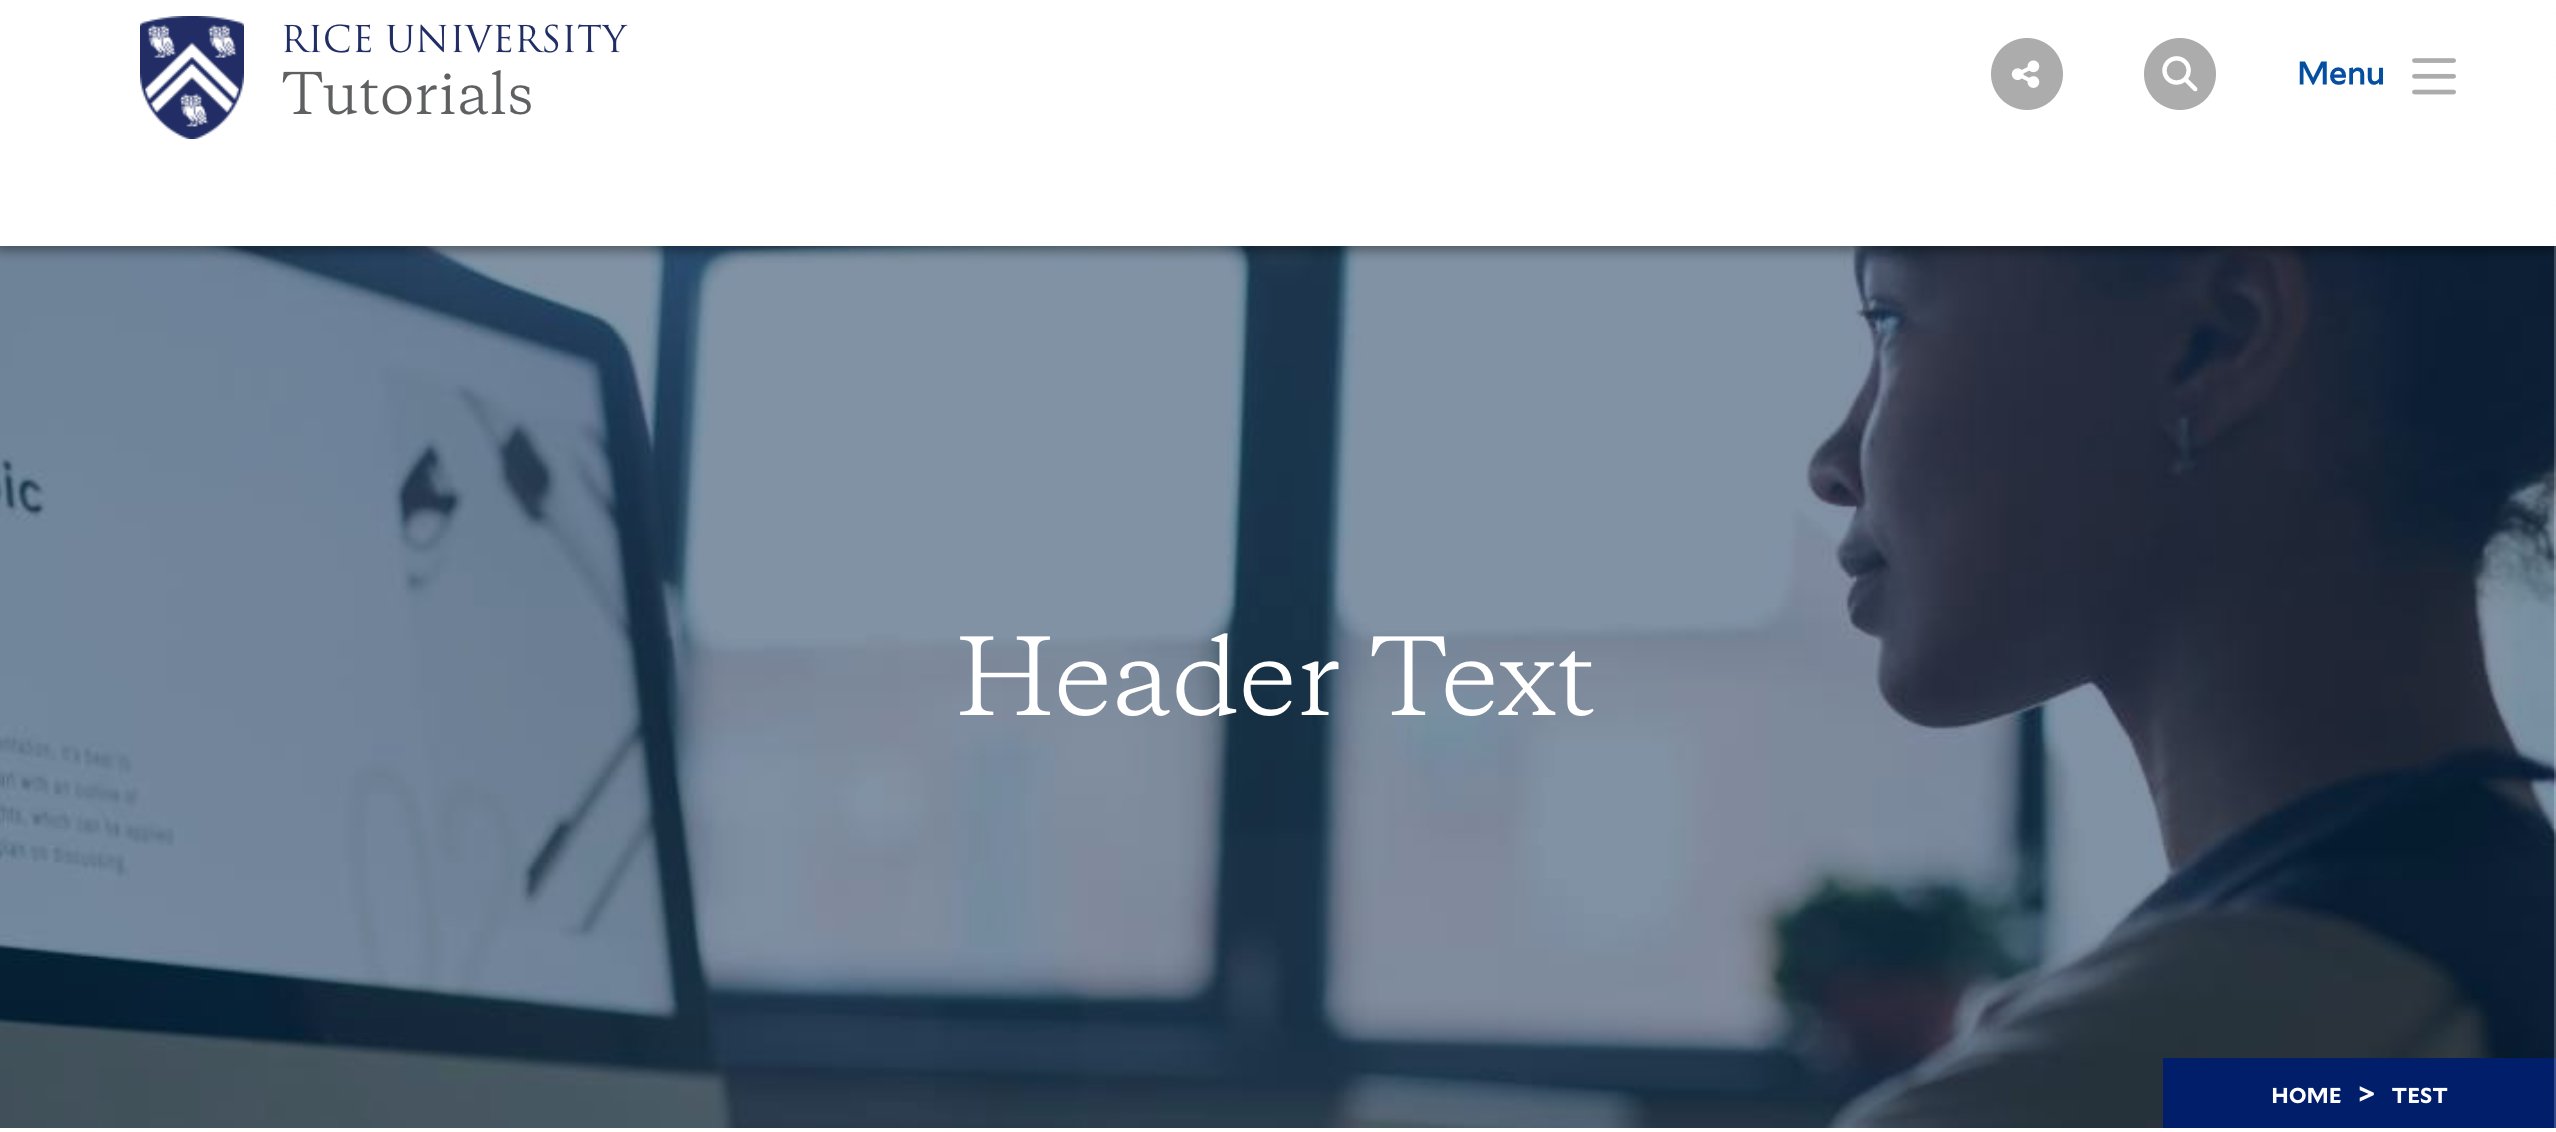
The overlay gives contrast to the hero images, allowing for inputted custom text to display over the background of the hero image, which can be read by screen-readers and other accessibility devices and acts as the header text of the page. Thus, it renders the text-based images as a background nearly illegible.
Example:
Accessible Solution:
Use a photo or image without text that is lower than or equal to 256 MB. Allowed types: png gif jpg jpeg.
Then, add the desired Hero Title text under the Hero Image section.
Body Area
- 3.6. Body: Main content to the page. This area will also allow you to caption images, add pull quotes and embed other elements in the copy of the page.
- 3.7. Quick Links: These links appear below the Hero Body in a blue bar. These links are used to link other internal or external content to the page.
- 3.8. Category (Advanced)
- 3.9. Tags (Advanced)
- 3.10. Publish
4. Meta Tags (Advanced) are snippets of text that describe a page’s content; the meta tags don’t appear on the page itself, but only in the page’s code.
