
Creating a Form
How to create a Drupal webform.
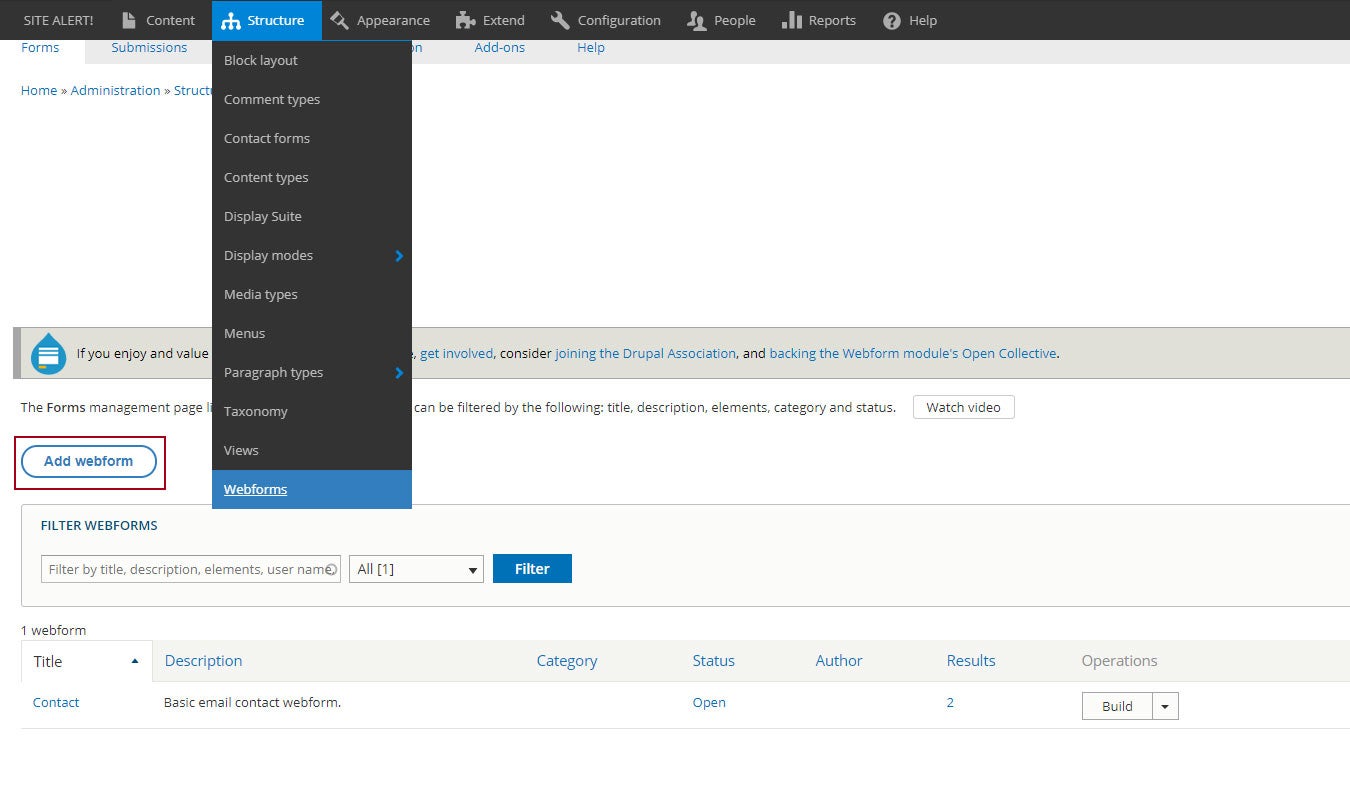
Go to Structure > Webforms
Hit the "Add webforms" button. A window will pop up after you hit the "Add webforms" button. Type in your form title, and then hit Save.
On the next page, hit the "Add element" button to add your desired fields onto the form.
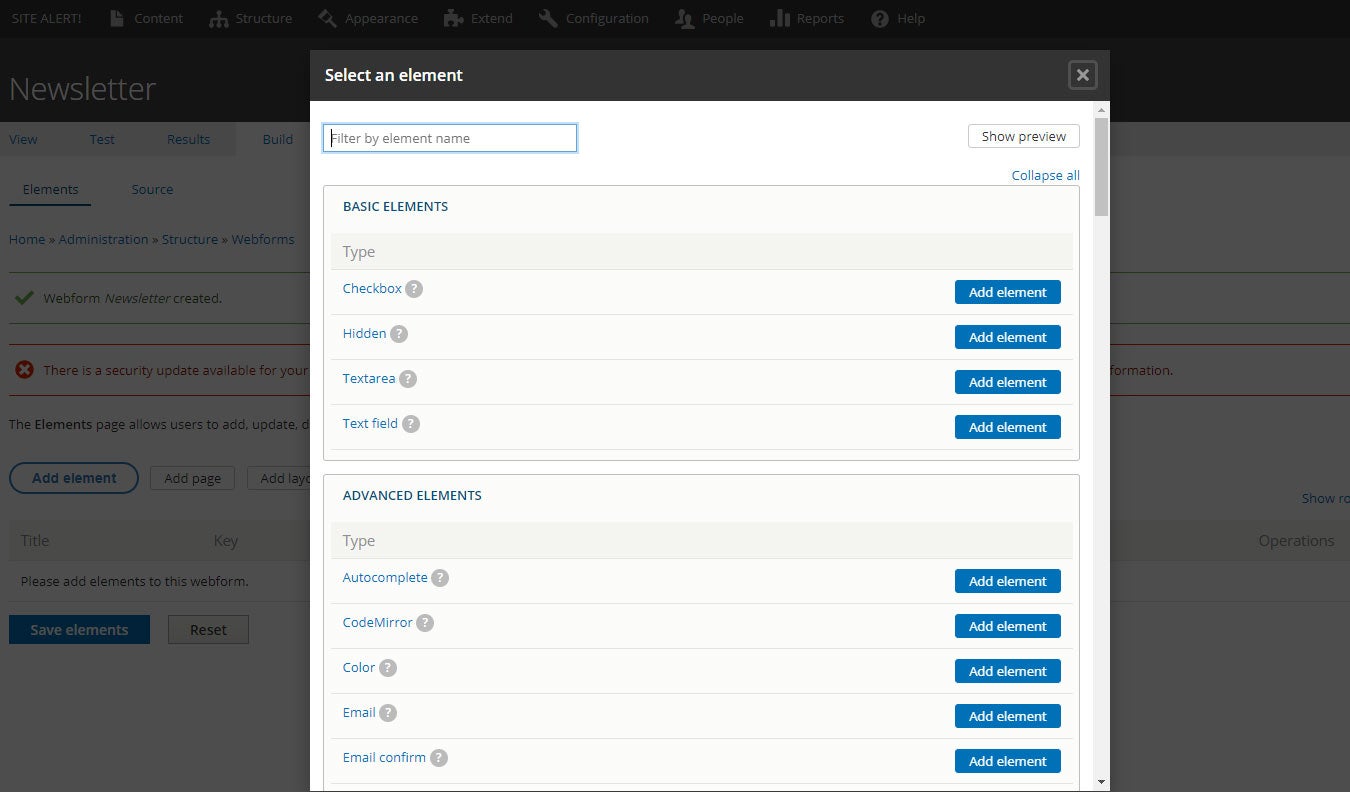
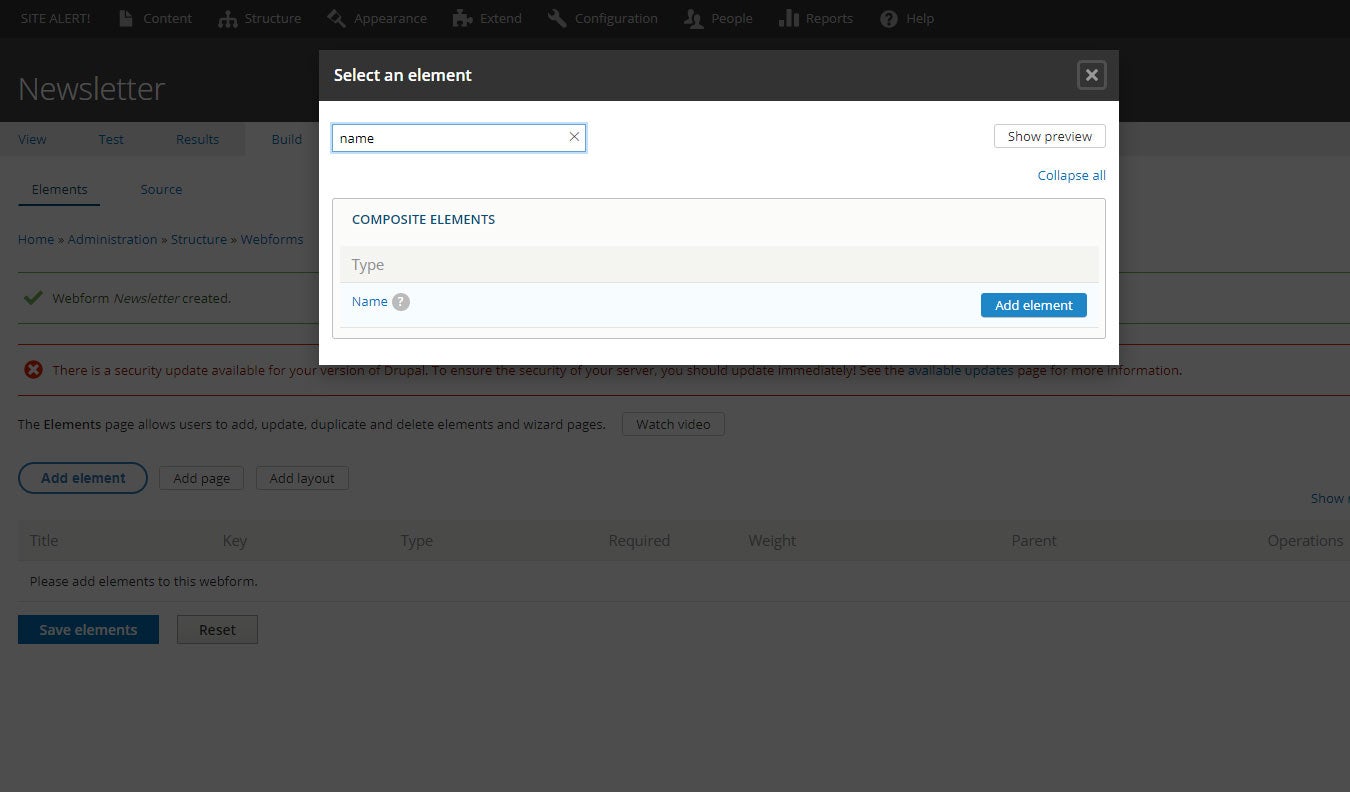
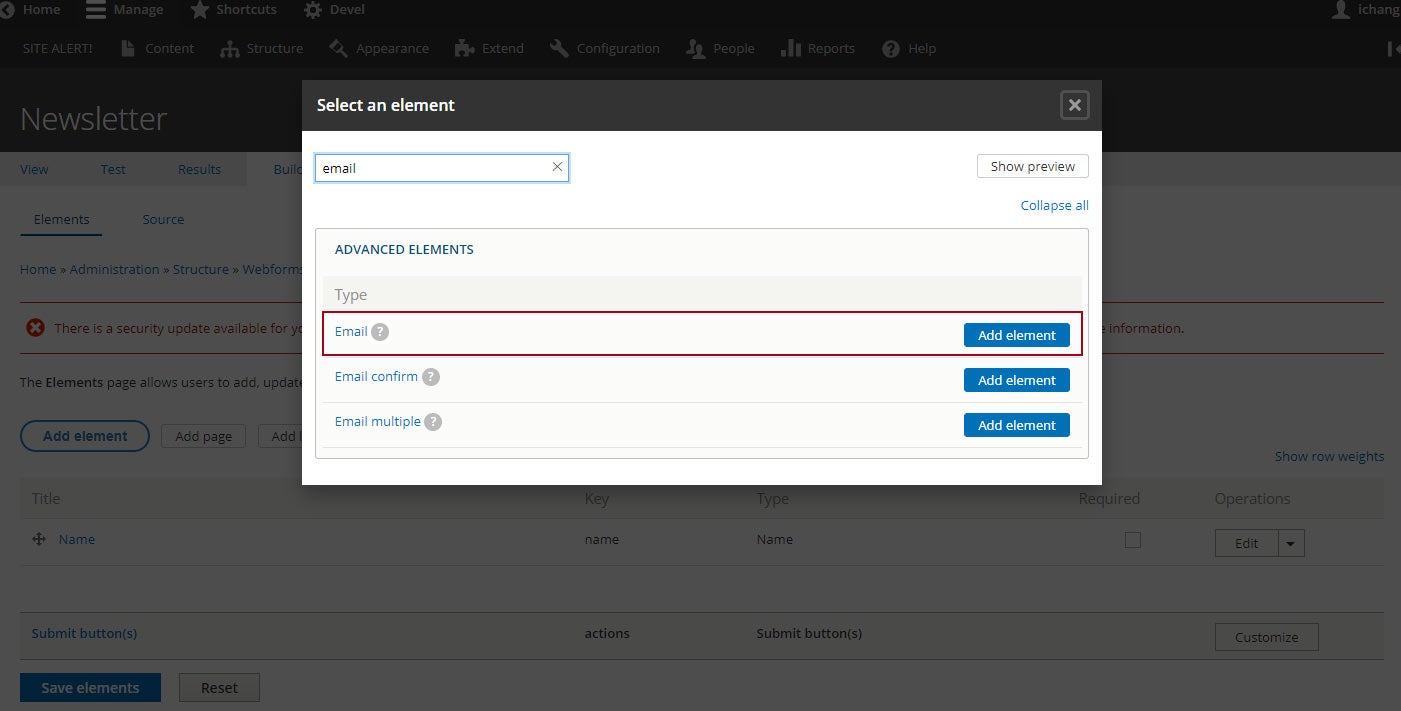
You can scroll through all the elements to see which one you'd like to add, or you can search for your desired element in the "Filter by element name" text box at the top. I searched for name to add the Name element to my form
After you hit Add element a window will open at the right of your screen. Give it a Title. I called mine Name. In the Name Settings I unchecked title, I hit the Required checkbox for first, I unchecked middle, I hit the Required for last, I unchecked suffix and degree. Then I hit Save.
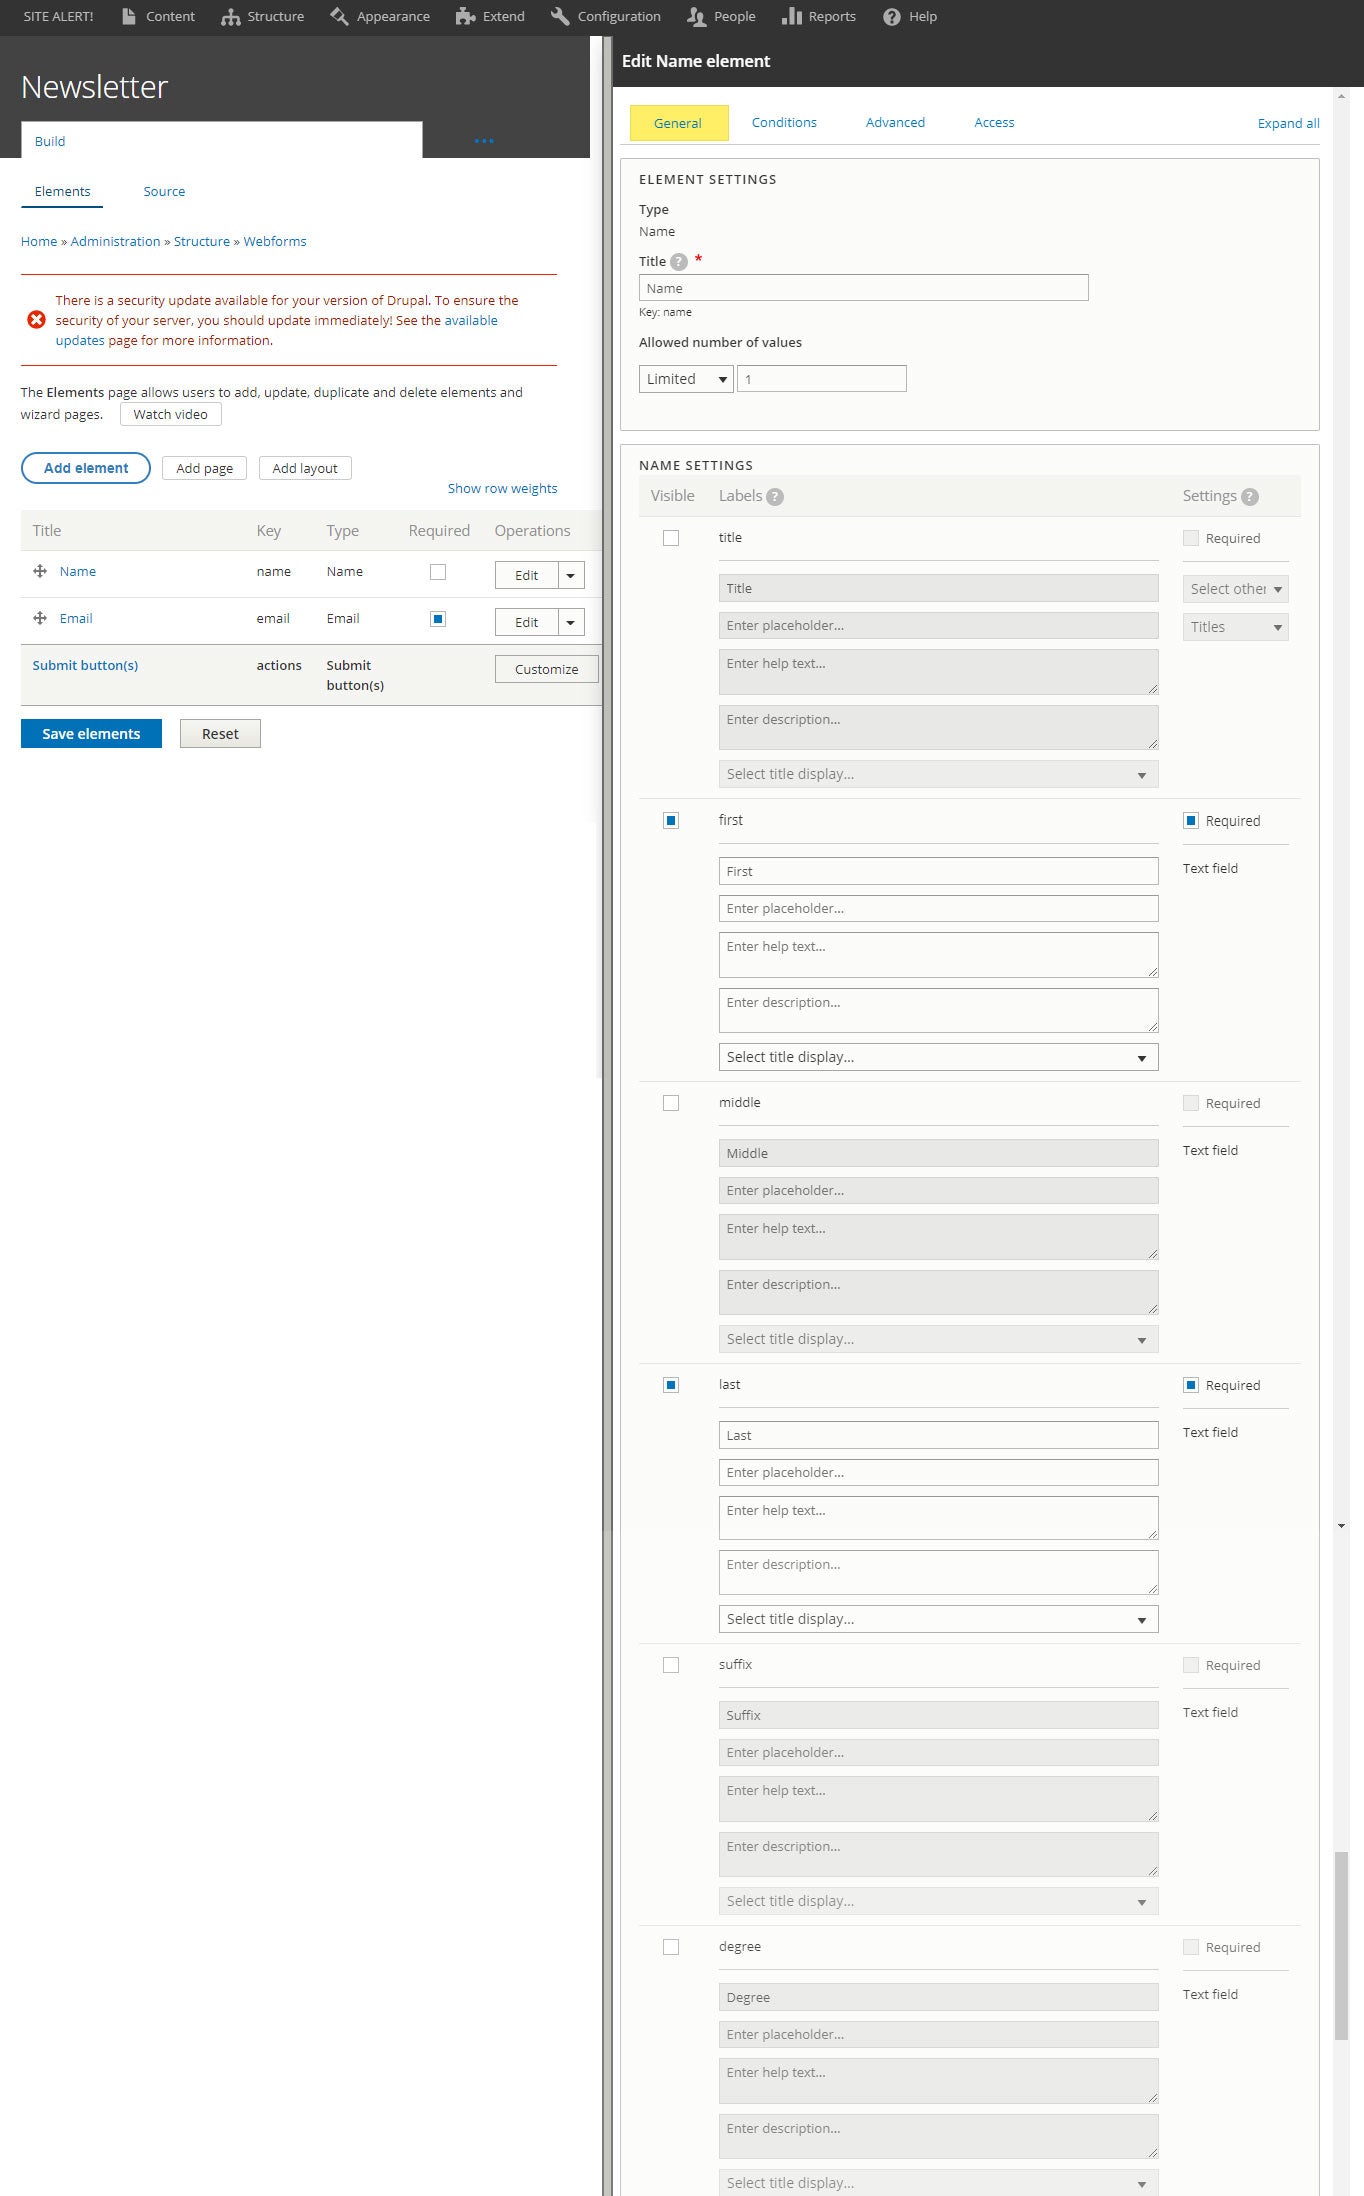
Then I added an Email element and made it a Required element. The Email element must be added (and the Required checkbox should be checked) if you plan on sending a confirmation email to the user(s) who fill out the form.

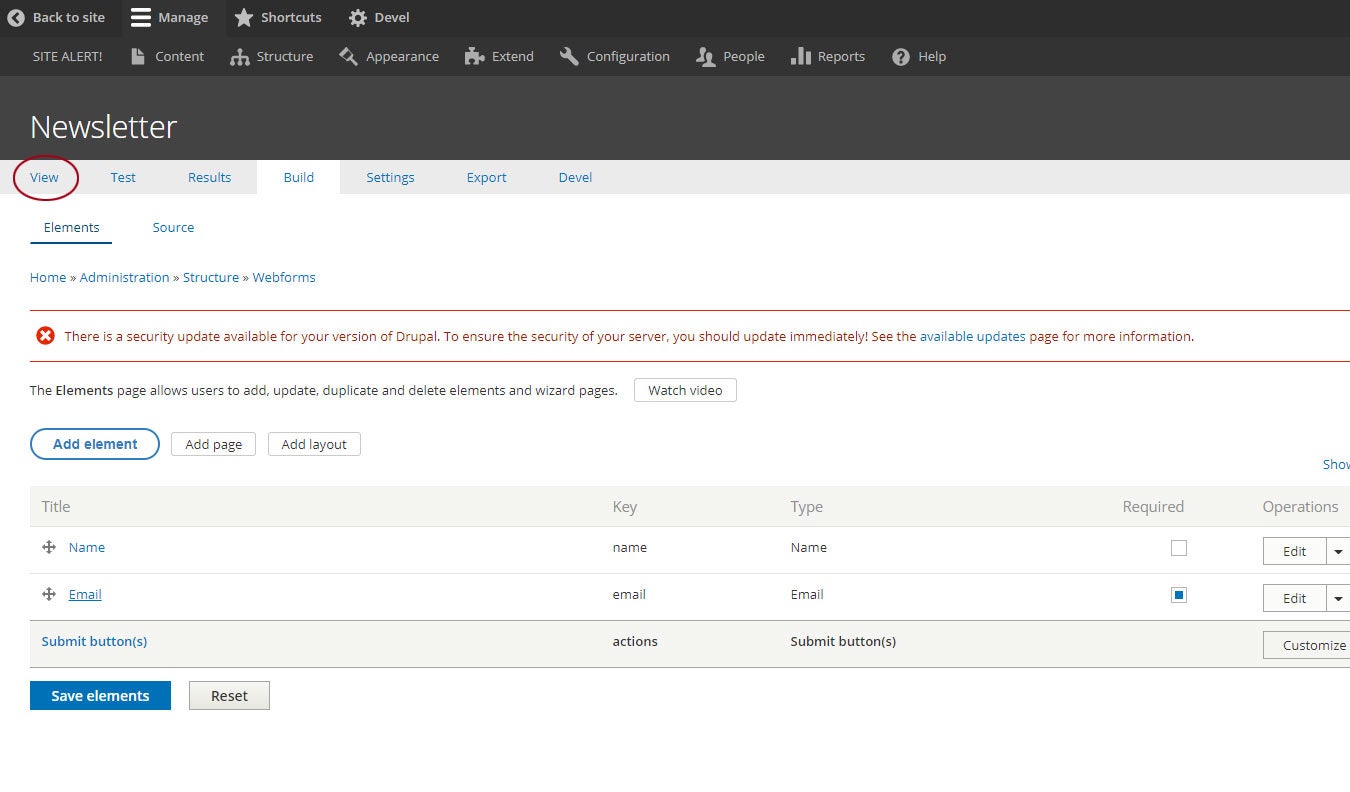
After hitting Save, the following page appears. Click the View text link to see what the form looks like.
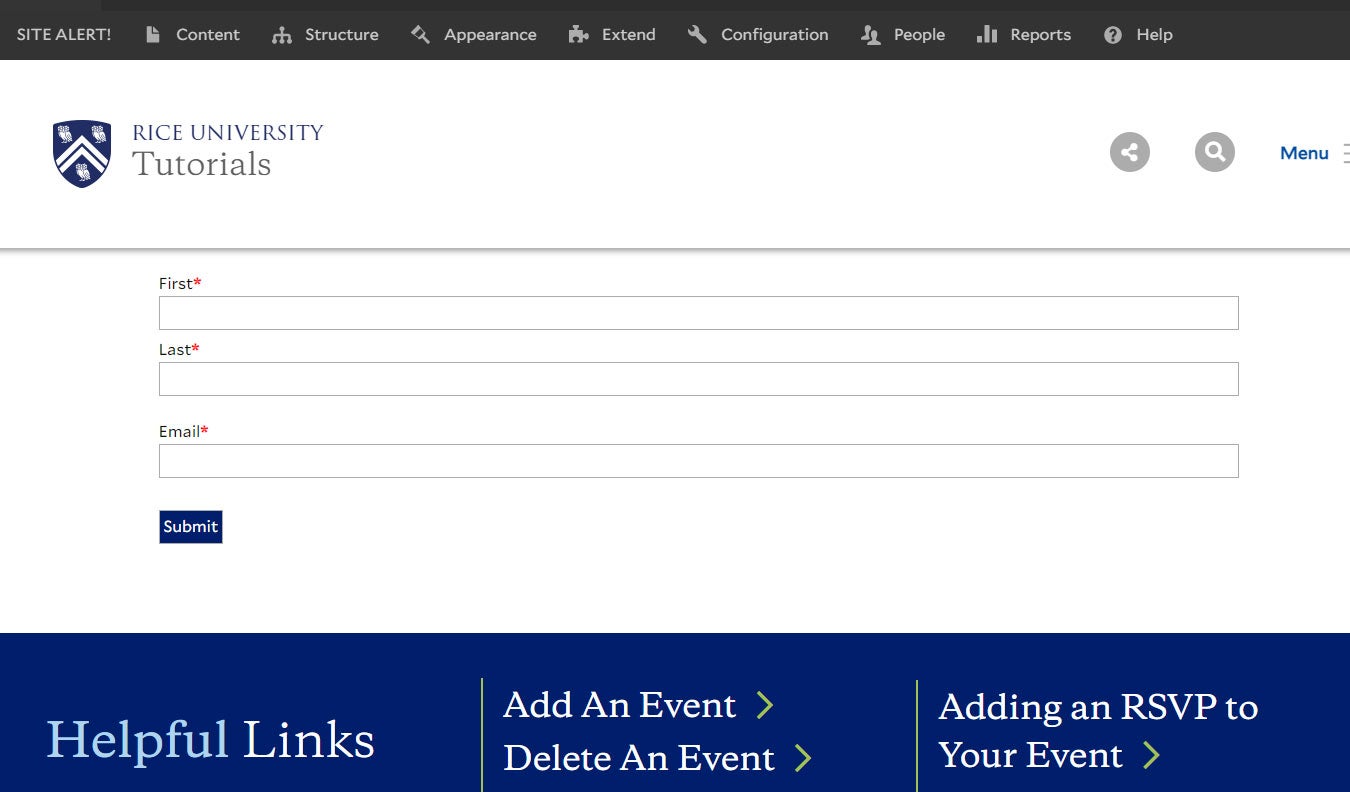
After you hit View, this is the form with the Name element (first and last name required) and Email element (required)
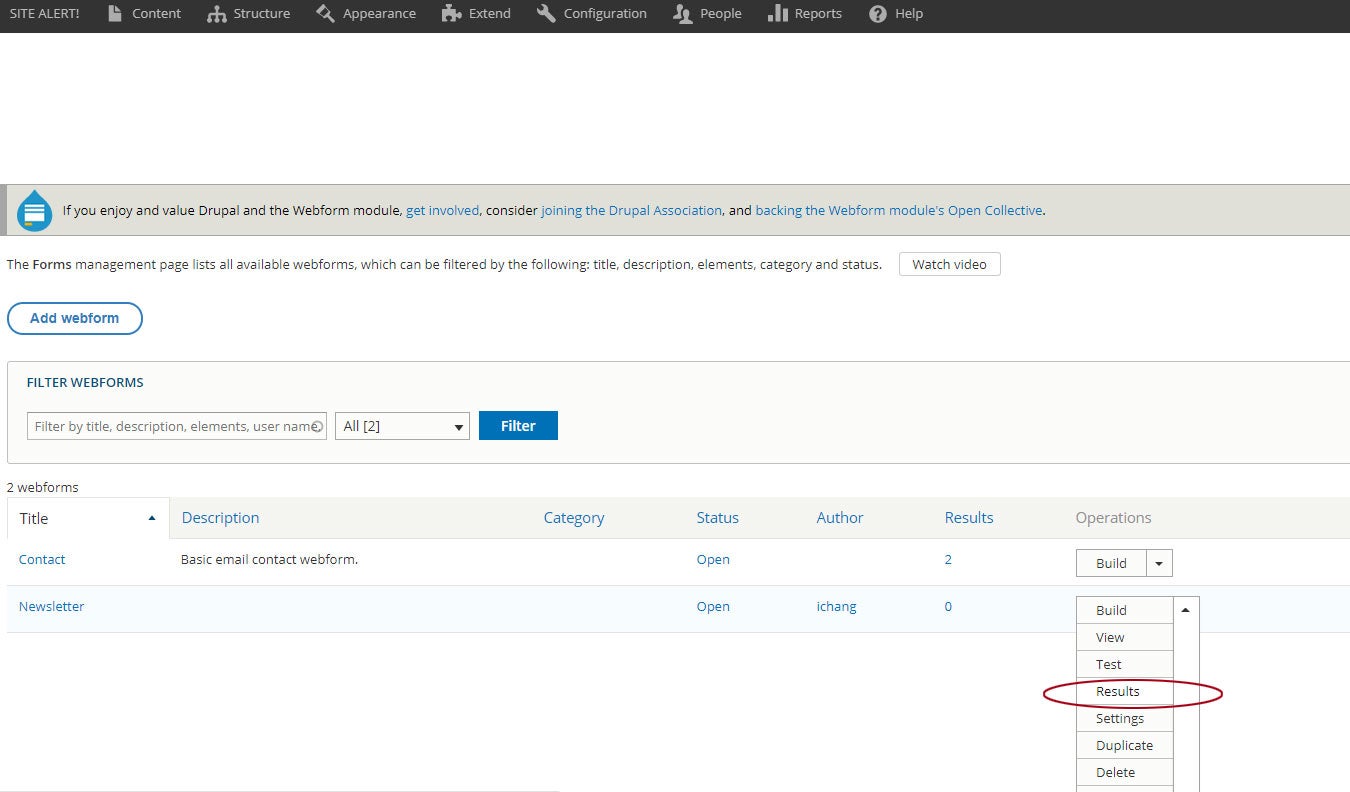
To view submissions to the webform, go to Structure > Webforms. To the right of your Form, hit the dropdown arrow and choose the Results link.
Get form results via email
To add an email to the form (so when the user submits the form, it will be sent to the email address as well as appear in the Results section), choose the Build dropdown of your form.
On the next page, go to Settings > Emails/Handlers > Add email
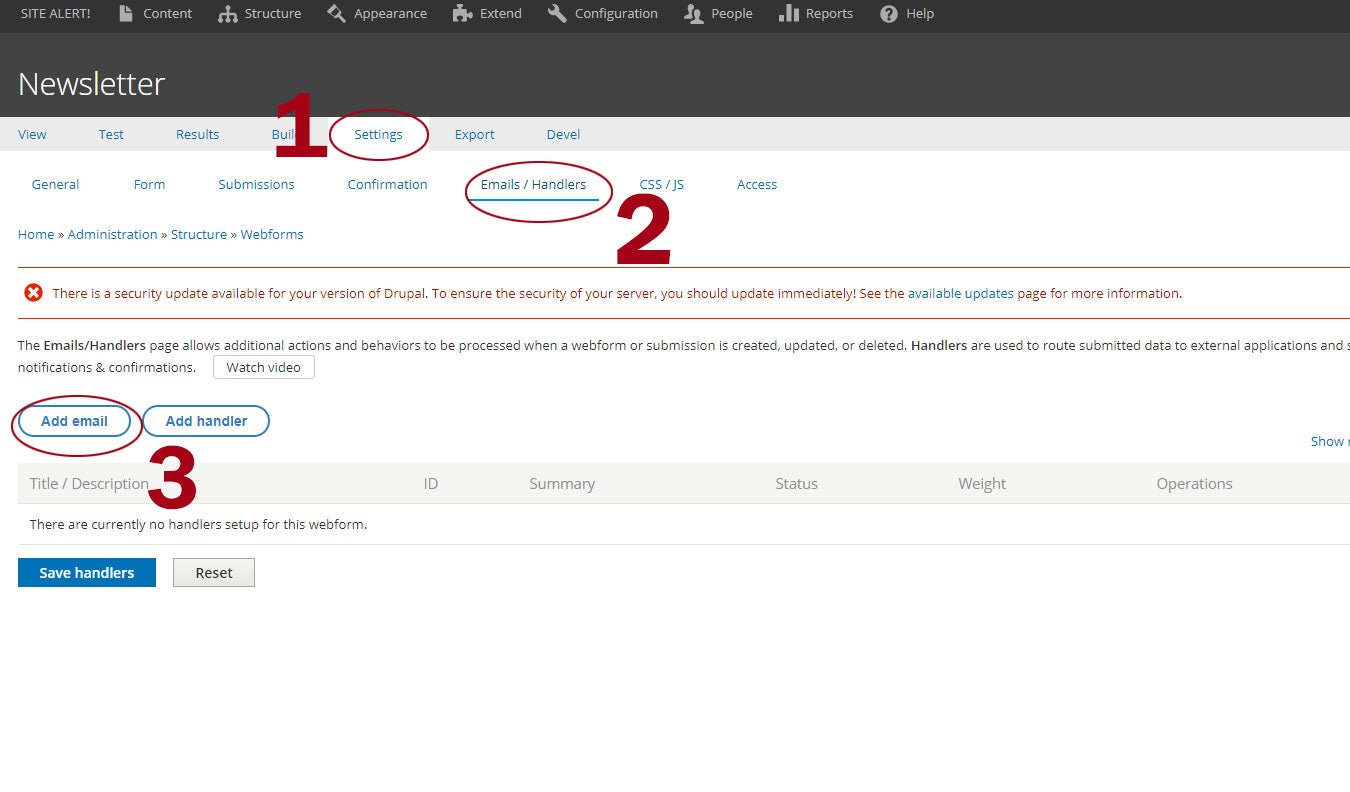
After you hit the Add email button, add the following to your form:
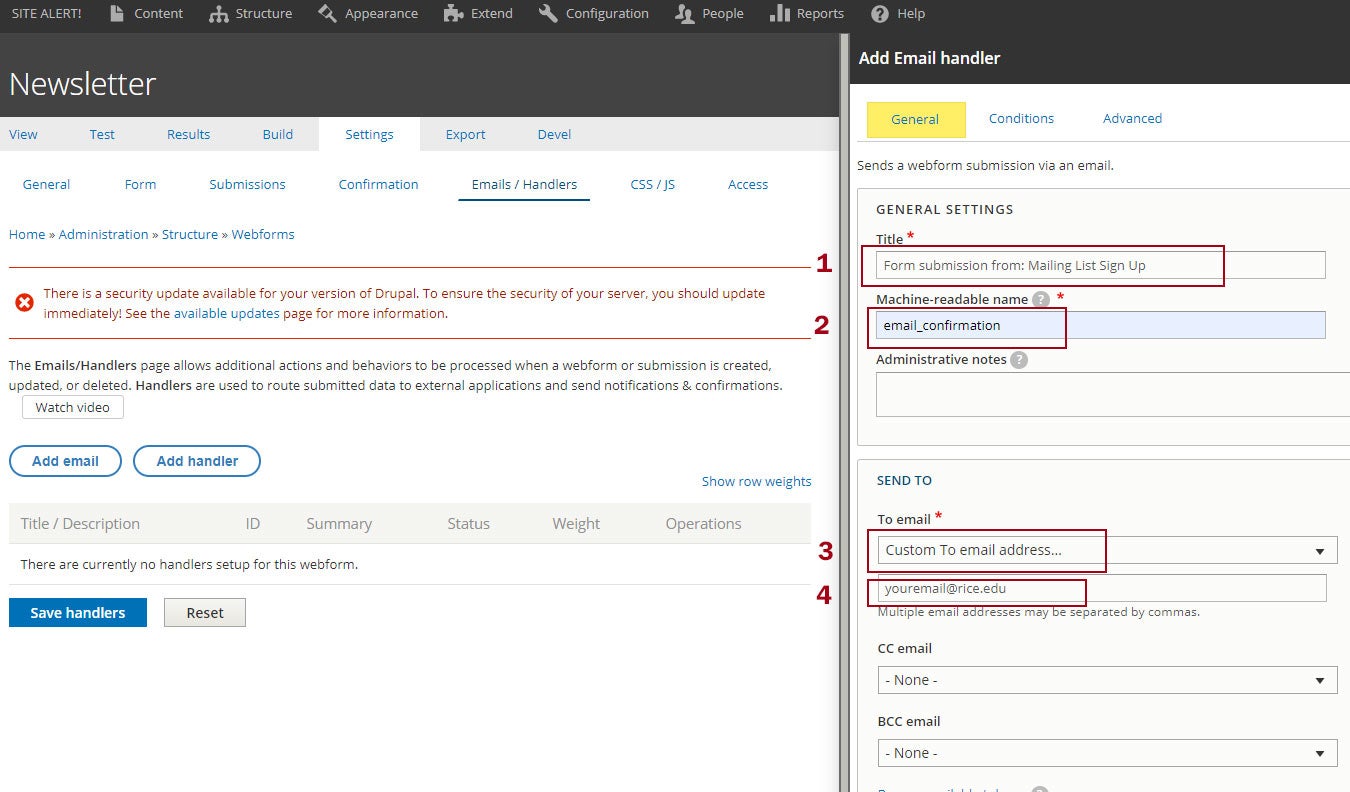
1. Title. This is the subject of the email that you will receive-- the email is basically a notification that someone hit submit on your form.
2. Under the Title will be very small text name- email [Edit]. Hit the Edit link. Enter in email_confirmation to the Machine-readable name field.
3. For the To email, choose the Custom To email address... dropdown
4. Add the email you want the notification sent to (usually your department email or your personal email, but preferably an email you have access to)
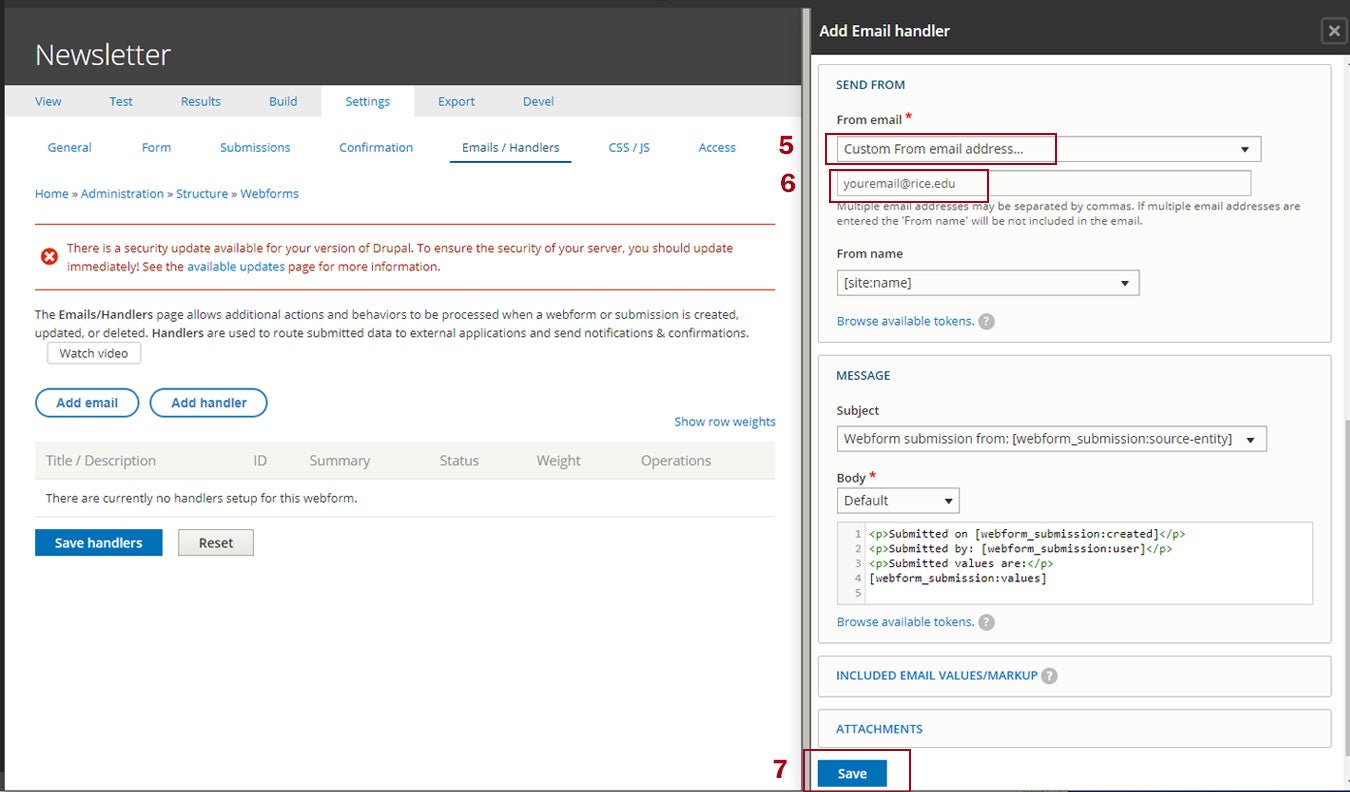
5. For From email, choose the Custom To email address... dropdown
6. Add the same email address you added in 4
7. Hit Save
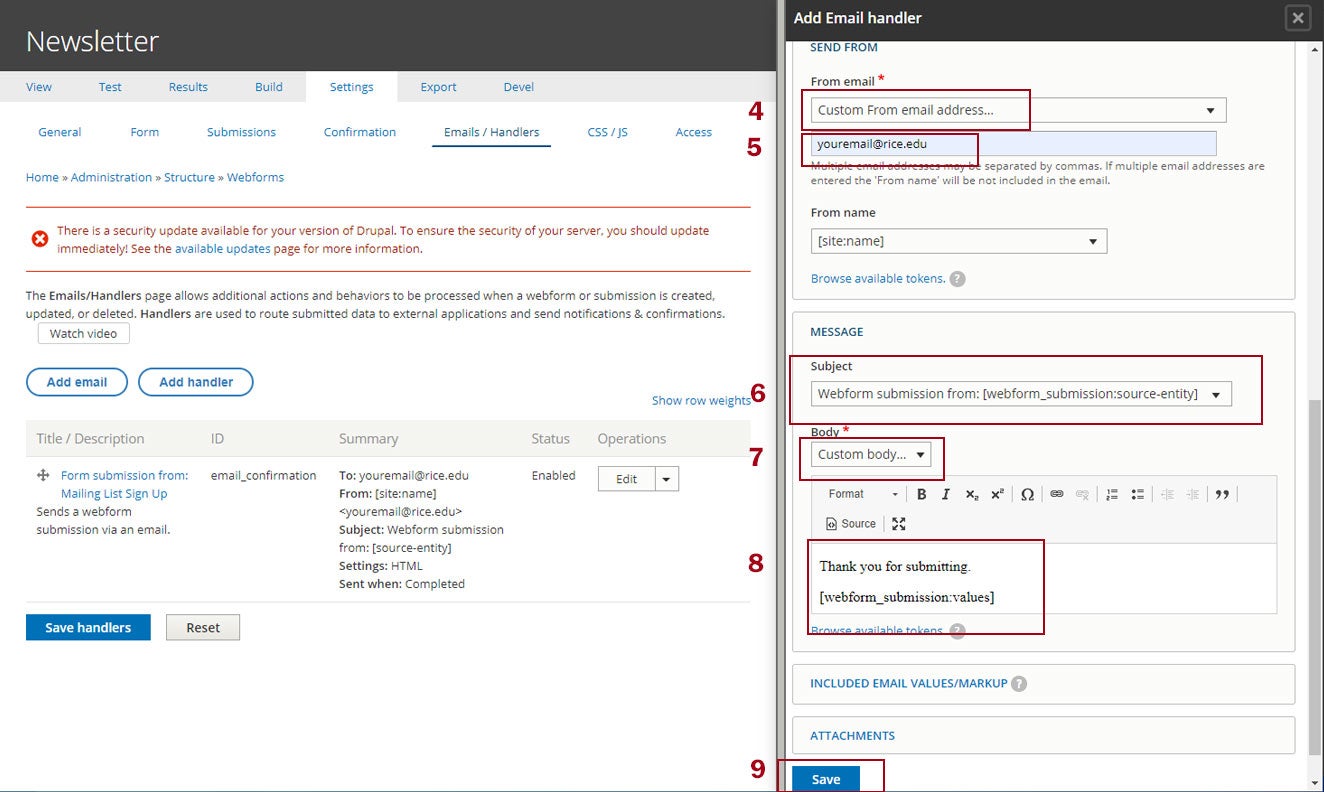
After you hit Save, hit the Add email button again. This will be the email sent to the user who filled out and submitted the form.
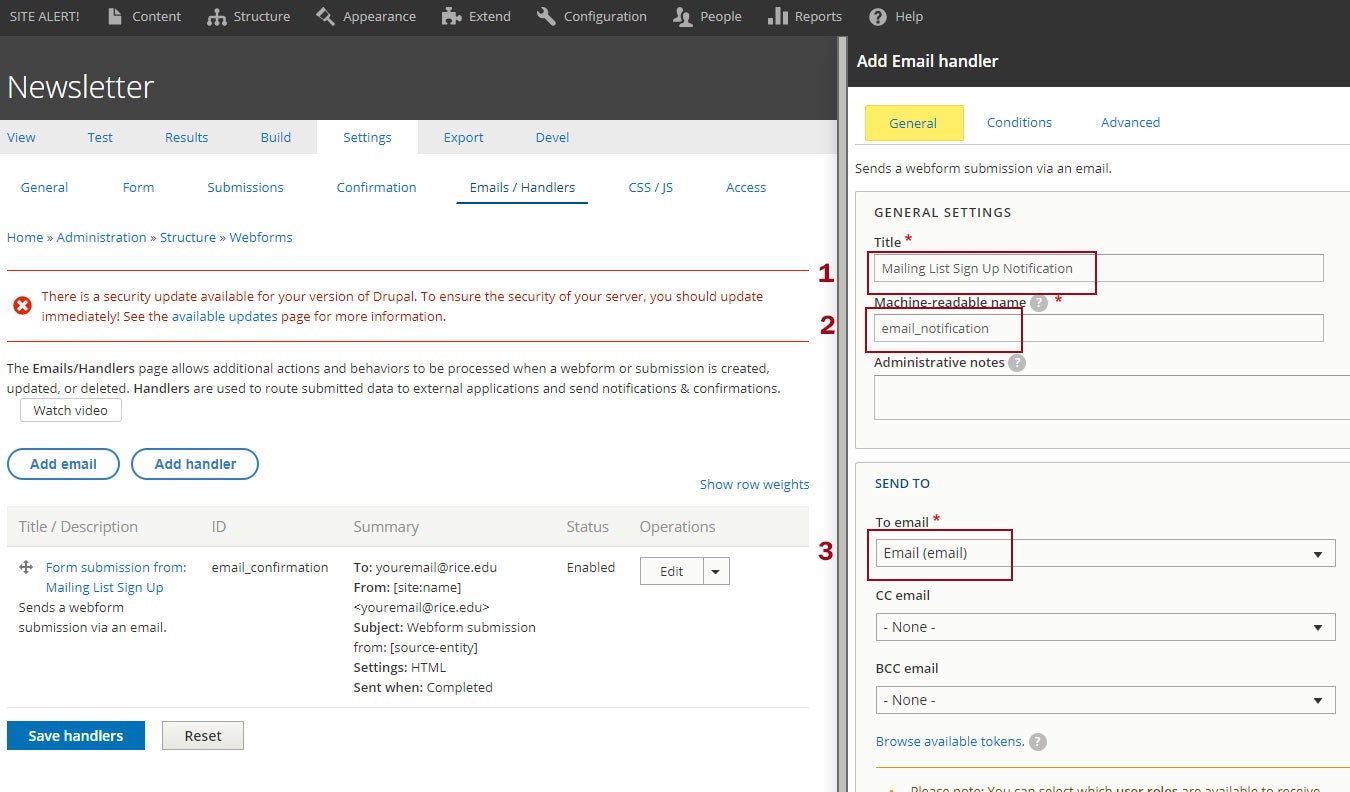
1. Title. This is the subject of the email that the user will receive-- the email is basically a confirmation that the form was submitted successfully.
2. Under the Title will be very small text name- email [Edit]. Hit the Edit link. Enter in email_notification to the Machine-readable name field.
3. For the To email, choose the Email (email) dropdown. (This option will only appear if you have the Email element in your form.)
4. For From email, choose the Custom To email address... dropdown
5. Add the same custom email address you've been using
6. For the Message Subject, keep it on Webform submission from: [webform_submission:source-entity]
7. Body dropdown: you can keep it as Default, or you can create your own custom email confirmation. To make your own custom message, choose the Custom body... dropdown
8. You can write anything in this textarea. I added [webform_submission:values] at the bottom so that everything the user filled out on the form will be shown on the email
9. Hit Save
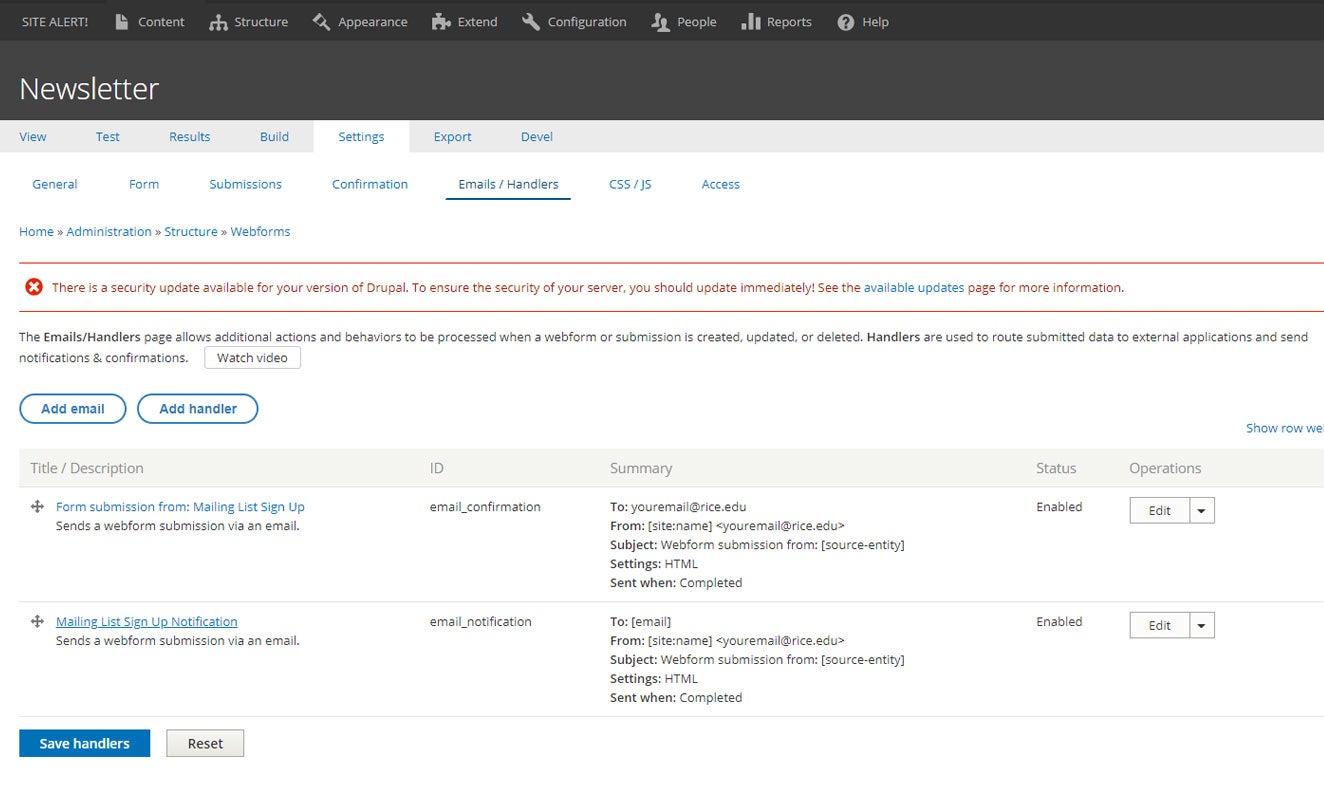
This is what your Emails/Handlers section will look like after you hit Save
To go back to edit your form, hit the Build tab at the top. Or to see what your form looks like, hit the View tab.